


Ingredients
SPICED SWEET BUN DOUGH
- 275 g water
- 5 tsp instant dried yeast
- 550 g white bakers flour
- 1 tsp salt
- 2 tsp milk powder, (optional)
- 2 tsp bread improver, (optional)
- 65 g sugar
- 2 tsp ground cinnamon
- 2 tsp ground nutmeg
- 45 g Butter
BUN DOUGH ADDITIONS
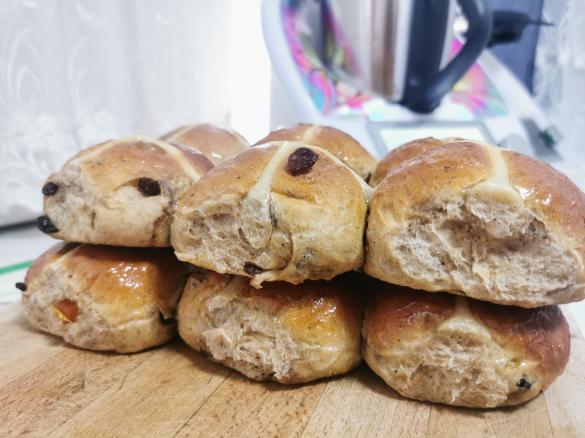
- 250 g sultanas or mixed dried fruit
CROSS MIXTURE
- 4 tbsp flour, (cross mixture)
- 2-3 tbsp water, (cross mixture)
BUN GLAZE
- 1 tbsp sugar, (bun glaze)
- 1 tbsp water, (bun glaze)
Accessories you need
-
 Spatula TM5/TM6
Share your activity
I'm cooking this todayRecipe's preparation
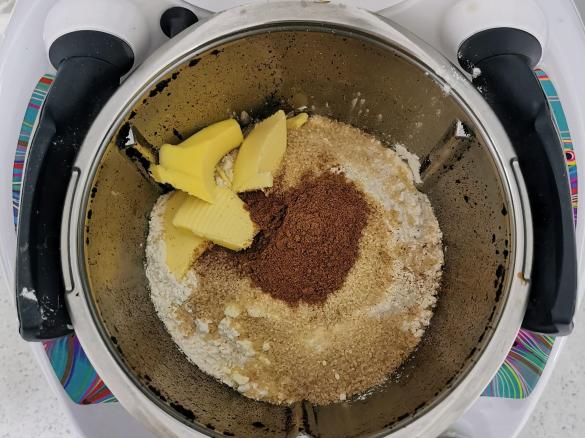
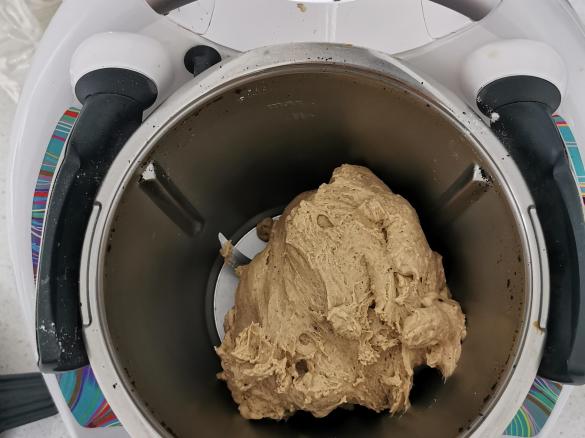
- 1. Add spiced sweet bun dough ingredients (water, yeast, flour, salt, milk powder, bread improver, sugar, cinnamon, nutmeg & butter) to bowl. Knead 8 minutes dough mode.
- 2. Transfer dough to a thermomat or lightly oiled surface, cover with a tea towel & allow to rest for 15 minutes.
- 3. Flatten dough into a rectangle. Sprinkle over sultanas, roll into a log, then knead by hand until well combined. (This can take a few minutes — avoid kneading in the Thermomix as it can shred the fruit.)
- 4. Wrap in a thermomat or cover with a tea-towel & allow the dough to rest for another 15 minutes.
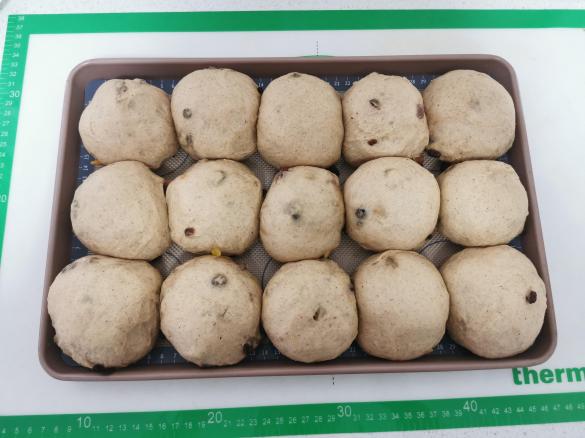
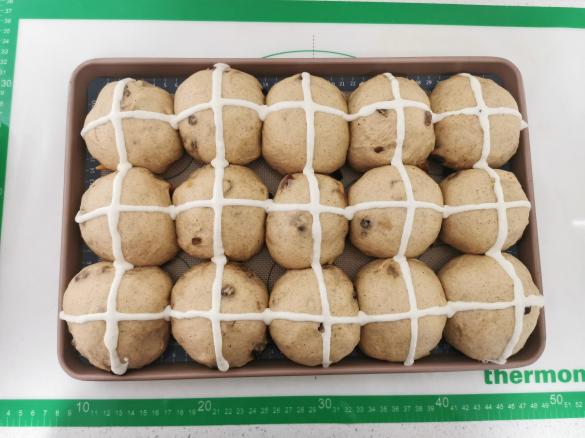
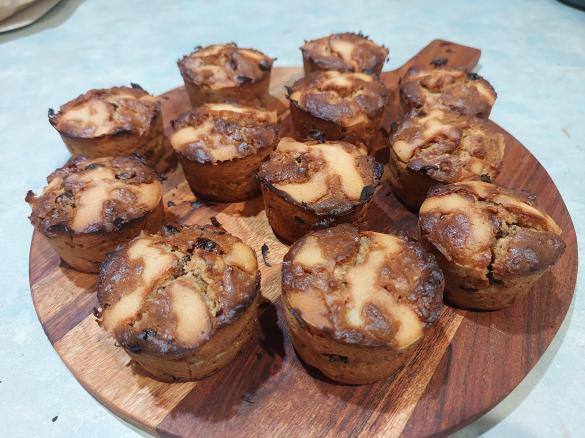
- 5. Divide dough into 15 portions (approx. 80–85 g each). Roll into balls & place onto a lined baking tray, spaced a few cms apart. Cover with a tea towel to prevent drying while rolling.
- 6. Place tray in a warm, moist area to prove. If proving in a dry heat, lightly spray the dough & cover — otherwise the dough will dry out. This process may take 1–2 hours (or longer) depending on the weather. Only move onto the next step once buns have doubled or tripled in size — this is very important. Buns should look puffy & soft before baking.
- 7. When the buns have risen sufficiently & are almost ready to bake, add the cross mixture (flour & water) to your bowl & mix 30 seconds, speed 4. Scrape down. Repeat. You want a nice thick paste. Using a piping bag or syringe, draw x's on the top of your buns.
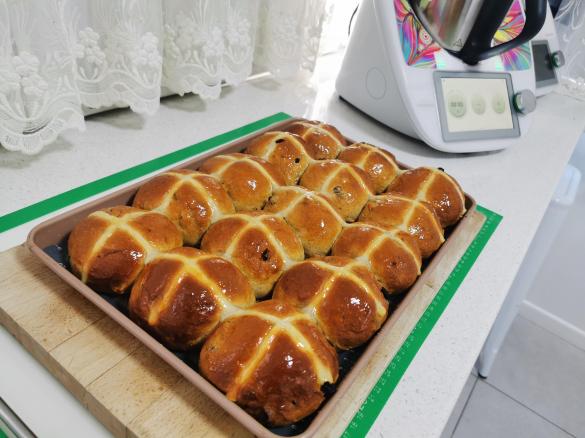
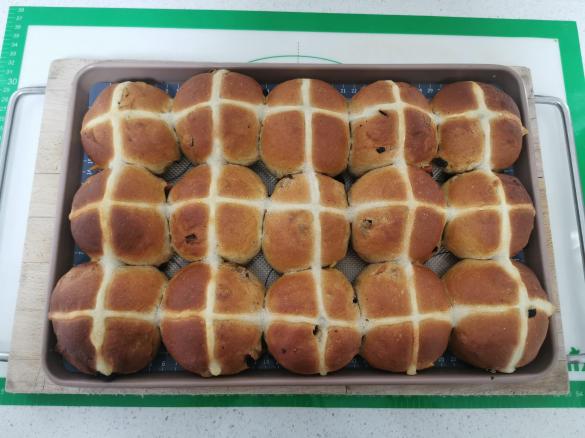
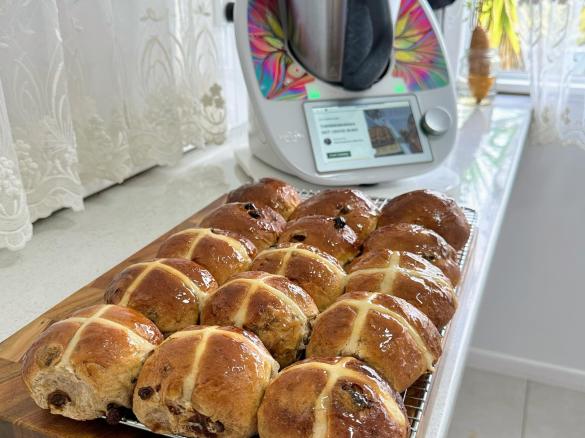
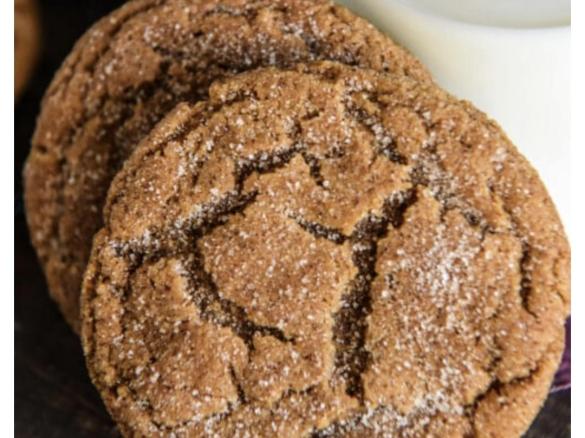
- 8. Bake in a preheated oven at 180°C for 20/25 minutes or until golden brown.
- 9. Add glaze ingredients (water & sugar) to bowl & cook 3 minutes / 100°C / speed 3 / lid cap off. Brush glaze over hot buns immediately after baking.
- 10. From my family to yours - enjoy x
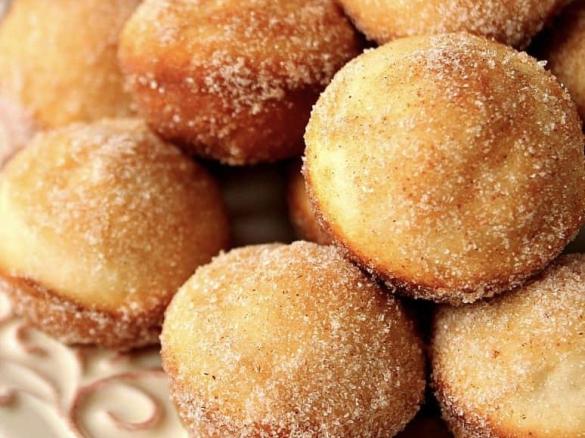
SPICED SWEET BUN DOUGH
CREATING CROSSES
HOT CROSS BUN GLAZE
Tip
https://m.facebook.com/story.php?story_fbid=pfbid0313ribA7x74e1hXRUVnH5h9mV4rFLJpsG3kFJfmFTStCpintYSM4RCSgF6sb5WdVgl&id=100044178802458&mibextid=qC1gEa
CROSSLESS BUNS...
To make regular fruit buns, simply skip the cross mixture.
FRUITLESS BUNS...
Fruit can be omitted if preferred.
MILK POWDER:
Optional. You can replace some of the water with milk if desired.
PROVING...
Proving is when you allow dough to rise in a warm environment until doubled or tripled in size.
Dough proves best in a warm, slightly humid space. Avoid direct dry heat (heater or hot oven), as this can dry the dough out.
A simple method is placing a bowl of boiling water in a turned-off oven & sitting the tray above it. The steam creates a warm, moist environment. Refresh the water if needed.
Other options include a warm room, a bathroom after a hot shower, or near gentle heat sources.
You don’t need to overthink it — just allow time. In cooler weather, proving will take longer.
MAKING THE NIGHT BEFORE...
Lightly spray cling wrap with oil, cover loosely & place in the fridge overnight to slow the yeast.
The next day, remove from the fridge, allow to come to room temperature & continue rising until doubled. Add crosses & bake as normal.
Allow plenty of time for the dough to warm up, as the yeast will take a while to become active again.
Thermomix Model
-
 Recipe is created for
TM 7
-
 Recipe is created for
TM 6
For cooking (simmering) at temperatures of 95°C or above (200°F), the simmering basket should always be used instead of the TM6 measuring cup, as the TM6 measuring cup fits tightly in the lid. The simmering basket rests loosely on top, is steam-permeable, and also prevents food spatter from the mixing bowl. -
 Recipe is created for
TM 5
If you are using a Thermomix® TM6 measuring cup with your Thermomix® TM5:
For cooking (simmering) at temperatures of 95°C or above (200°F), the simmering basket should always be used instead of the TM6 measuring cup, as the TM6 measuring cup fits tightly in the lid. The simmering basket rests loosely on top, is steam-permeable, and also prevents food spatter from the mixing bowl.Please note that the TM5 mixing bowl has a larger capacity than the TM31 (capacity of 2.2 liters instead of 2.0 liters for TM 31). Recipes for the Thermomix TM5 may not be cooked with a Thermomix TM31 for safety reasons without adjusting the quantities. Risk of scalding by spraying of hot liquids: Do not exceed the maximum filling quantity and observe the filling level markings of the mixing bowl!
-
 Recipe is created for
TM 31


This recipe was provided to you by a Thermomix ® customer and has not been tested by Vorwerk Thermomix ® or The Mix Australia Pty Ltd and The Mix New Zealand Ltd.
Vorwerk Thermomix ® and The Mix Australia Pty Ltd and The Mix New Zealand Ltd assume no liability, particularly in terms of ingredient quantities used and success of the recipes.
Please observe the safety instructions in the Thermomix ® instruction manual at all times.


Comments
Lailah you've done it again! I made these buns over the Easter weekend and they could not have been easier or more delicious. I didn't have sultanas in the house, so I left them out and I also didn't bother with the crosses so I guess I made spiced buns ha ha
I was a little worried about them rising enough but they really did get 3 x the size and they were gorgeous.
*NOTE* although the recipe transfers to Cookiedoo correctly in the main ingredient list, when you are doing the guided cooking and see ingredients on the scale page, the water measurement comes up incorrectly. Make sure you are putting in the whole 275ml.
These are amazing!, but doesn't anyone know why the day after baking them they're hard? I like to make a few batches for the week lunches but mine go too hard. I follow the recipe exactly.
My go to recipe for hot cross buns. Perfect every time!
Today i am going to try making them in a loaf tin !
So fluffy, I didn't need to use milk powder or milk and the taste was amazing
Made these for the first time today, fluffy and delicious. Only change I made was after the kneading of the dough I put it in my stand mixer and added the sultanas gradually. I find that doing it this way keeps the sultanas whole. Thanks for posting this recipe
I've used different fillings also, plain, sultana, apple and cranberry, cherry ripe chunks, and they all taste sensational!
Thank you for sharing this recipe, it all worked beautifully, your instructions excellent and also pictures very helpful. Well done. Beautiful flavour and texture.
Perfect!! everyone that tried them said they were better then the shops 🤗
Thank you for this great recipe, it was a great success even without adding the bread improver. And makes the house smell so good