

Preparation time
20min
Total time
50min
Portion
0
portion(s)
Level
easy

Ingredients
Non Fried, Fried Rice
- 1/4 cauliflower, cut into florettes
- 2 stalks Celery, roughly chopped
- 2 carrots, roughly chopped
- 1/2 red capsicum, cut into 4 peices
- 4 sprigs flat leaf parsley, leaves only
- 2 sprigs basil, fresh, leaves only
- 150 g Frozen Corn Kernals
- 150 g frozen peas
- 1 brown onion, peeled and quartered
- 1-2 red chillies, halved, (Optional)
- 2 cloves garlic
- 4-6 Bacon rashers (rindless, short cut), cut into thirds
- 20 g Rice Bran Oil
- dash sesame oil
- 900 g water
- 350 g Jasmine Rice or Basmati rice
- 2 eggs, lightly beaten
- soy sauce
- Kecap Manis (dark sweet soy sauce)
- salt and pepper to taste
- BBQ Chicken meat, chopped, (Optional extra)
Accessories you need
-
 Varoma
 -
 Simmering basket
 -
 Spatula TM5/TM6

Share your activity
I'm cooking this todayRecipe's preparation
- 1. Place the Cauliflower florettes in Varoma Bowl.
2. Place celery, carrots and capsicum in TM bowl, chop 3-4sec/Sp 4-5. Add to Varoma Bowl.
3. Place Parsley and Basil in TM Bowl, chop 3sec/Sp 7. Add to veggies in Varoma Bowl.
4. Place Varoma Bowl into position and weigh in corn and peas. Set Varoma Bowl aside.
5. Place onion, garlic and chillies in TM bowl, chop 3sec/Sp 6. Add bacon, chop 2sec/Sp 5. Scrape down sides and only if there is a chunk or two of bacon, chop again for 1 sec/Sp 5. Scrape down sides.
6. Add both oils and saute for 5min/100*/ "Counter-clockwise operation" /Sp 1. Add this to the Varoma on top of the veggies (have the Varoma lid underneath to catch any liquid which may drain through). No need to wash the TM bowl.
7. Place water in TM bowl, insert simmer basket, weigh in the rice. Place the lid on and put the Varoma Bowl into position with the Varoma lid on top. Cook 10min/Varoma/Sp 4.
8. While the rice is cooking, cut a peice of baking paper to fit the Varoma Tray (not too big that it blocks the side vents), wet the paper under the tap, scrunching it a little, lay it on the Varoma Tray, curving the sides and ends up a little, so that the egg won't run off. Pour the beaten egg on the baking paper. Pre heat the Thermo Server with a little boiling water (2cm deep).
9. When cooking at step 6 is finished, place the Varoma Tray, with the egg on it, into position on the Varoma Bowl. (If you are adding BBQ Chicken, place it in the Varoma Bowl on top of the veggies before you place the tray of egg on). Cook 10min/Varoma/Sp 4. Check that egg is cooked, if not, cook 2min/Varoma/Sp 2. Roughly cut up the egg with the spatula.
10. Dry out the Thermo Server, add the rice and then the veggie mix plus egg. Add the sauces a swirl at a time and carefully mix together, also adding salt and pepper until you are happy with the ammount of sauces. Serve immediately.
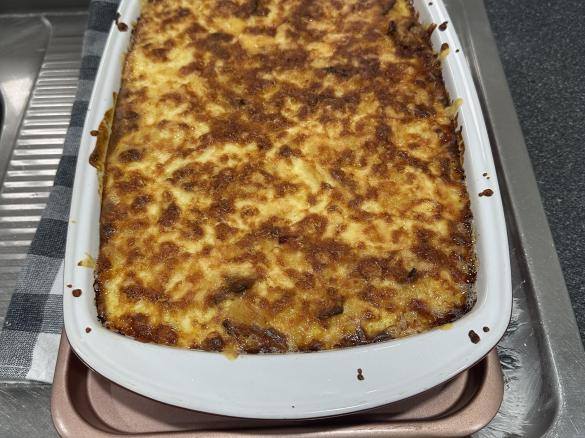
Hunters version of Non Fried, Fried Rice
Tip
To make this vegetarian, leave out bacon and optional chicken, Replace bacon with mushrooms at same step. For vegan, leave out egg too.
Make sure you don't pile on too many veggies in the Varoma Bowl as you need to leave room for the tray with egg on it to sit properly when the time comes.
A Thermo Server is very handy to mix the final result together but, if you don't have one, use a large bowl or serving dish.
You can prepare the veggies in the Varoma bowl early and keep in the fridge to make dinner time quicker, the corn and peas don't have to be frozen at the time of cooking.
I'd like to thank Witsy for the Original Non fried, fried rice recipe, very clever. I just wanted to write my own version so I've got an easy reference.
Thermomix Model
-
 Recipe is created for
TM 5
If you are using a Thermomix® TM6 measuring cup with your Thermomix® TM5:
For cooking (simmering) at temperatures of 95°C or above (200°F), the simmering basket should always be used instead of the TM6 measuring cup, as the TM6 measuring cup fits tightly in the lid. The simmering basket rests loosely on top, is steam-permeable, and also prevents food spatter from the mixing bowl.Please note that the TM5 mixing bowl has a larger capacity than the TM31 (capacity of 2.2 liters instead of 2.0 liters for TM 31). Recipes for the Thermomix TM5 may not be cooked with a Thermomix TM31 for safety reasons without adjusting the quantities. Risk of scalding by spraying of hot liquids: Do not exceed the maximum filling quantity and observe the filling level markings of the mixing bowl!

This recipe was provided to you by a Thermomix ® customer and has not been tested by Vorwerk Thermomix ® or The Mix Australia Pty Ltd and The Mix New Zealand Ltd.
Vorwerk Thermomix ® and The Mix Australia Pty Ltd and The Mix New Zealand Ltd assume no liability, particularly in terms of ingredient quantities used and success of the recipes.
Please observe the safety instructions in the Thermomix ® instruction manual at all times.
Recipe's categories:
1st main course
2nd main course
Main course
Side dish
Autumn
Chinese New Year
Christmas
Father's Day
Grandparent's Day
Mother's Day
Spring
Summer
BBQ
Buffet
Everyday
Holiday
Kids in the kitchen
Party
Easy
Low budget
Quick
Asian
Australian
Dinner
Lunch
Steam cooking with Varoma
All-in-one cooking with Varoma
Rice dish
Other users also liked
Show me similar recipes by:


Comments
hello every one
Yummy and easy, thank you!
jhunteer: Thanks for the great review and star rating! My family love this one too. I know it's not an original of mine but I wanted to adapt it to suit my family. Thanks again.
YUM YUM YUM! this one is everyone’s favourite, love making it spicy! And that it can be eaten as a side dish or as the main!!!