


Preparation time
4h 8min
Total time
4h 8min
Portion
12
portion(s)
Level
medium

Ingredients
Base
- 125 grams Butter, Cold, Cubed
- 300 grams Chocolate Digestives
- 25 grams Coconut, Desiccated
Cheesecake
- 300 grams thickened cream
- 340 grams cream cheese, Hard block, cubed
- 30 grams sugar, White or Caster
- 180 grams Milk
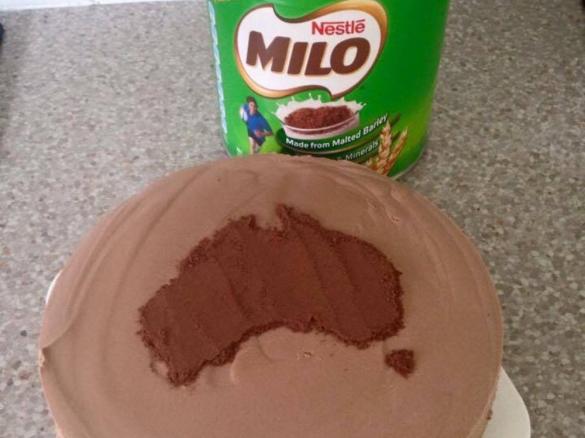
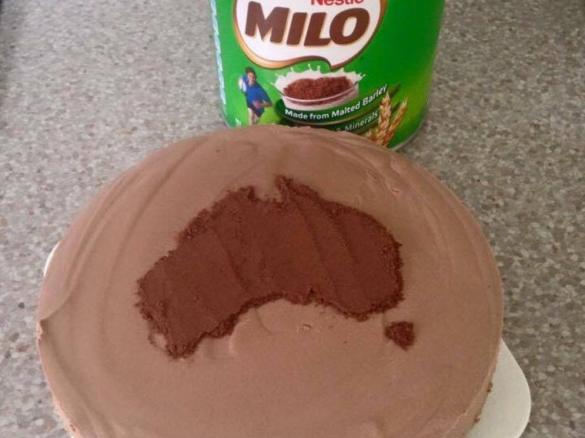
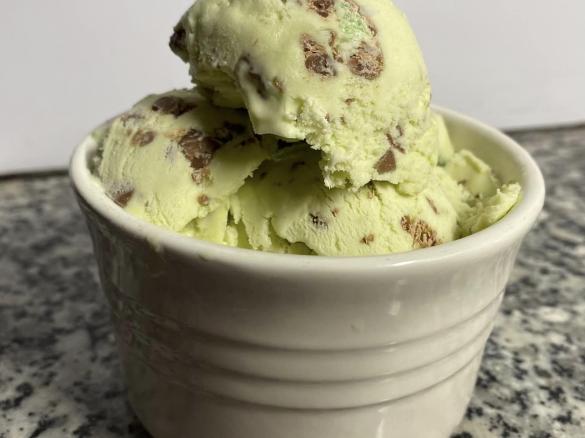
- 150 grams Milo
- 4 teaspoons gelatine
- 3 tablespoons hot water
Accessories you need
-
 Butterfly
 -
 Spatula TM5/TM6

Share your activity
I'm cooking this todayRecipe's preparation
- Before beginning, please read through all steps & tips.
Take cream cheese out of fridge, cube and set aside. - Place butter, biscuits & coconut into bowl. Mix for 15 Seconds/ Speed 6.
Line springform tin and press base mixture into tin evenly. Place into refridgerator. Clean and dry mixing bowl. - Insert butterfly on blades, then place cream into bowl. Blend on Speed 3 until softly whipped ~ Keep an eye on cream so as not to turn into butter.
Remove butterfly & Set aside cream in another bowl. - Without washing the bowl, Add cream cheese and sugar to mixing bowl. Mix for 15 seconds/ Speed 5, Scrape down sides of bowl and repeat.
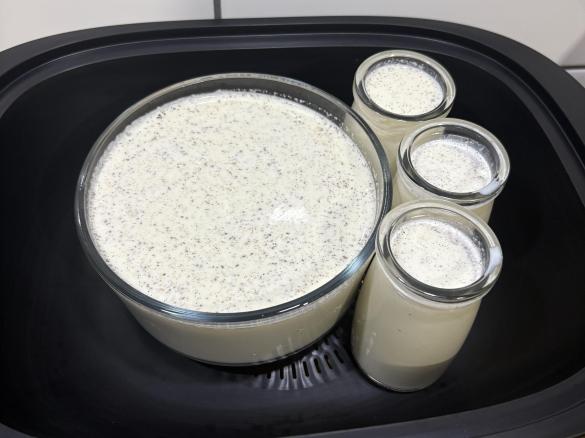
Set aside in another bowl. - Without washing the bowl, Place milk into bowl. Heat for 4 minutes 30 seconds/ 90 degrees/ Speed 3. While milk is heating, spoon gelatine powder into small bowl and add hot water, leave to dissolve.
Once milk has finished heating, add Milo to bowl and combine 40 seconds/ Speed 3.
Spoon gelatine mixture into bowl through mixing bowl lid while they are combining. - Add cream cheese mixture to mixing bowl and combine for 15 seconds/ Speed 3.
Scrape down sides and add whipped cream to mixing bowl and cobine for another 15 seconds/ Speed 3. - Take springform pan out of fridge and pour cheesecake mixture in. Tap carefully on bench to rid of any air bubbles.
Leave to set in refrigerator for minimum of 4 hours or overnight.
Enjoy!
Base
Cheesecake
Tip
This is my adaption of Steph from Raspberri Cupcake's Milo Cheesecake with Chocolate Crackle Crust (//www.raspberricupcakes.com/2013/01/milo-cheesecake-with-chocolate-crackle.html)
This is well worth the effort! I have made it for a few Australia Day BBQs now and its always been popular (and Re-requested!)
I have changed the base as well as I found the original really solid and hard to cut, the consensus was this base was prefered!
My Thermomix version has made it a lot less fiddly (No milk on the stove with the cream in a mixer etc!)
I suggest making sure you have all your ingredients out & ready, especially for step 5 while combining the milo and then the gelatine!
Lastly, enjoy! This tastes like a mixture between a mousse and cheesecake, which is perfect for an Australian summer aussie day celebration! Light, chocolately & delicious!
Thermomix Model
-
 Recipe is created for
TM 5
If you are using a Thermomix® TM6 measuring cup with your Thermomix® TM5:
For cooking (simmering) at temperatures of 95°C or above (200°F), the simmering basket should always be used instead of the TM6 measuring cup, as the TM6 measuring cup fits tightly in the lid. The simmering basket rests loosely on top, is steam-permeable, and also prevents food spatter from the mixing bowl.Please note that the TM5 mixing bowl has a larger capacity than the TM31 (capacity of 2.2 liters instead of 2.0 liters for TM 31). Recipes for the Thermomix TM5 may not be cooked with a Thermomix TM31 for safety reasons without adjusting the quantities. Risk of scalding by spraying of hot liquids: Do not exceed the maximum filling quantity and observe the filling level markings of the mixing bowl!

This recipe was provided to you by a Thermomix ® customer and has not been tested by Vorwerk Thermomix ® or The Mix Australia Pty Ltd and The Mix New Zealand Ltd.
Vorwerk Thermomix ® and The Mix Australia Pty Ltd and The Mix New Zealand Ltd assume no liability, particularly in terms of ingredient quantities used and success of the recipes.
Please observe the safety instructions in the Thermomix ® instruction manual at all times.
Recipe's categories:
Other users also liked
Show me similar recipes by:


Comments
Amazing recipe, super easy to follow, didn't change any steps except not using dessicated coconut and turned out beautifully")