

Ingredients
Base
- 80 g Butter
- 250 g Chocolate Biscuits, (I used chocolate ripple)
Layered Cheesecake topping
- 500 g cream cheese
- 400 g Tin condensed Milk
- 2 tsp Gelatine powder
- 50 g Boiling water, (1/2 MC)
- 2 Snickers chocolate bars
- 50 g cream, (1/2 MC)
- 2 tbsp good quality cocoa powder
- 100 g Peanut Butter
- 2 tbsp peanuts for decoration
Accessories you need
-
 Spatula TM5/TM6
Share your activity
I'm cooking this todayRecipe's preparation
Snap biscuits in half and add to bowl with butter and mix for 10 seconds speed 6 or until biscuit comes together.
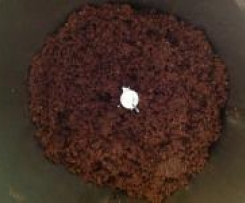

Press biscuit mix into a greased and lined springform cheesecake tin and allow to firm up in fridge. No need to bake
Mix gelatine powder with 1/2 MC of boiling water in your MC with a spoon until dissolved, then set aside and allow to cool.
Break Snickers bars into small pieces and chop for 3 seconds speed 6
Add cream and melt for 5 minutes speed 2 and 50C. Set aside. (If you have a second bowl set use it to make the cheesecake mixture while you put your bowl used for chocolate aside. Otherwise set aside your chocolate mixture, clean your bowl and move on)
Add cream cheese and condensed milk and mix 15 seconds speed 6.
Add cooled gelatine liquid to cheescake mixture in bowl and mix speed 4 for 4 seconds
Tip approx 2/3 of cheesecake mixture into another bowl, leaving 1/3 in your TM bowl.
Add cocoa powder to remaining mixture in your TM bowl and mix for 10 seconds on speed 4.
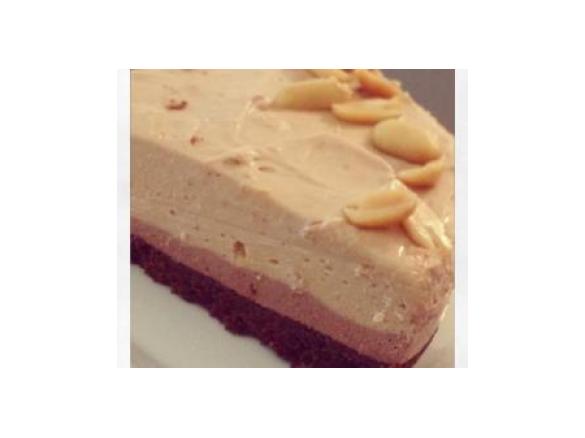
Pour chocolate cheesecake mixture onto biscuit base smoothing out nice and flat
Pour remaining cheesecake mixture back into TM bowl and add the snickers ganache mixture back in along with the 100g of peanut butter.
Mix together for 10 seconds speed 4 or until nicely combined.
Pour remaining cheesecake mixture on top and smooth and flatten out the top
Decorate top of cheesecake mixture with peanuts, or as desired. Allow to set in fridge before serving (1-2 hrs minimum)
Base

Cheesecake topping
Tip
You can bake the biscuit base before adding the cheesecake mixture if you prefer a firmer cheesecake base, for 10 mins on 180c.
Thermomix Model
-
 Recipe is created for
TM 31

This recipe was provided to you by a Thermomix ® customer and has not been tested by Vorwerk Thermomix ® or The Mix Australia Pty Ltd and The Mix New Zealand Ltd.
Vorwerk Thermomix ® and The Mix Australia Pty Ltd and The Mix New Zealand Ltd assume no liability, particularly in terms of ingredient quantities used and success of the recipes.
Please observe the safety instructions in the Thermomix ® instruction manual at all times.


Comments
Thanks for a great recipe! It took me an hour to make though and my layering didn't come out as pretty as your pic (it's difficult to judge how much a 3rd is, so my middle layer was bigger than the top one). As Jakalak said, may be easier to skip the layering. Everyone loved it and kept coming back for more.
Delicious and so easy to make. Thanks for a great recipe!
Great recipe and not too rich! The whole family enjoyed it... Thank you... I dont bother with the layers tho..... Thanks!
So yummy! Was a favourite with the family over Xmas time
This was quite tasty but I think a step maybe missing as there is no way you can later two runny liquids? Both of them mixed together when poure into the base.
Wow this looks amazing. I'm going to make it for Easter and decorate with mini eggs! Thanks!