


Ingredients
200g Azuki Beans
- 200 g Azuki Beans
- 150 g sugar
Accessories you need
-
 Simmering basket
 -
 Spatula TM5/TM6
Share your activity
I'm cooking this todayRecipe's preparation
Rinse the beans in water and remove any impurities or any irregular beans.
Place beans into the mixing bowl and add 300g of water. Boil the beans 100C
 "Counter-clockwise operation"
  "Gentle stir setting" 10 minutes. Drain the water.
(This step can be skipped. Some people believe that the beans should be soaked/cooked this way to remove any bitterness. I haven't found any bitterness by skipping this step. Azuki beans can be cooked and eaten without soaking unlike other beans).
Add 300g water into the bowl and cook 20 minutes 100C
"Counter-clockwise operation" "Gentle stir setting" .After this has been completed. Add 300g of water again and cook 15 minutes 100C
"Counter-clockwise operation" "Gentle stir setting" .You don't want to be left with too much water at the end so I feel safer doing it this way. Feel free to just do it all in one step if you wish and adjust the times. The beans should be soft enough to squash with a spoon by this stage.
Place the thermomix simmering basket into a bowl and drain beans into it. Keep the beans in the basket for now and keep the liquid in the bowl. Allow the liquid to settle and separate while you complete the next step.
Add the sugar into the mixing bowl with 2 Tablespoons of the bean water. Cook 5 minutes 100C Speed 2. Or cook until sugar has all dissolved.
Pour the beans back into the mixing bowl.
With the liquid that has now settled, gently pout it into another cup through a very fine sieve. Add the sediments that are in the sieve into the mixing bowl as well. Keep the bean water for later.
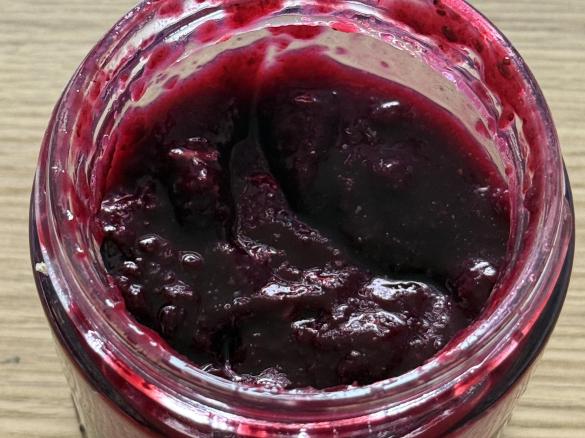
Puree the mixture. This is to your preference. Some people enjoy a chunky bean paste. I like a really smooth bean paste. This can be anywhere from 10 seconds to 30 seconds (I go the full 30) on speed 8.
This final step can be skipped if you wish. I like to dry out my bean paste a little so it's easier to use in cakes/bread recipes.
Cook bean paste 5 minutes, 100C, Speed 2.
Tip
Instead of washing out the bowl at the end and wasting the delicious bean paste, make a red bean drink. Measure in 200g of liquid (made up from water and the red bean water that you saved from before). Then either blitz for 15 seconds on speed 8 for a cold red bean drink.
Or if you prefer it warm, cook for 8 minutes, 100C speed 3 and then turn it up to speed 8 for the last 15 seconds.
If the flavour isn't strong enough, you can just stir in some of the red bean paste you've just made.
Thermomix Model
-
 Recipe is created for
TM 5
If you are using a Thermomix® TM6 measuring cup with your Thermomix® TM5:
For cooking (simmering) at temperatures of 95°C or above (200°F), the simmering basket should always be used instead of the TM6 measuring cup, as the TM6 measuring cup fits tightly in the lid. The simmering basket rests loosely on top, is steam-permeable, and also prevents food spatter from the mixing bowl.Please note that the TM5 mixing bowl has a larger capacity than the TM31 (capacity of 2.2 liters instead of 2.0 liters for TM 31). Recipes for the Thermomix TM5 may not be cooked with a Thermomix TM31 for safety reasons without adjusting the quantities. Risk of scalding by spraying of hot liquids: Do not exceed the maximum filling quantity and observe the filling level markings of the mixing bowl!

This recipe was provided to you by a Thermomix ® customer and has not been tested by Vorwerk Thermomix ® or The Mix Australia Pty Ltd and The Mix New Zealand Ltd.
Vorwerk Thermomix ® and The Mix Australia Pty Ltd and The Mix New Zealand Ltd assume no liability, particularly in terms of ingredient quantities used and success of the recipes.
Please observe the safety instructions in the Thermomix ® instruction manual at all times.
Other users also liked


Comments
Krissyanni7494: the soaking shouldn't affect the colour but it looks like you may have lost some of the skin as that gives it the colour. Mine is typically too wet so i often have to evaporate some of the water in a fry pan.
Check 1 for Colour: Your first boil and rinse should be shorterand to get rid of some of thee scum. As you are soaking it, it would be much softer at the same time. So try the first step and if it has boiled for a few mins at the 5 min mark at 100C, i would drain it but retain the liquid. You might get some of the skin but not a lot draining through. You shouldn't be draining after this so, this step might have been where you are losing the colour.
Check 2 for Consistency: If you are adding similar quantities of water, if pre-soaked, it should be a wetter consistency so i reduce the water if i pre-soak. So, i would suggest checking that you aren't draining more than once. You can add just a bit of water to make it creamier. The sugar tends to loosen the thickness as well. I always add cold water rather than hot to gently heat up the beans.
Check 3: the store bought anko tends to have a higher sugar to dry azuki weight ratio. Most modern recipes tend to be just a bit under 1:1. The higher sugar content also makes it glossy and dark, so i would recommend using the stated sugar quantities as a final check.
Check 4 for limiting the red skin discard: try using the steamer basket as it is possible with the smaller quantities stated with 1000g water. 10 mins / 100C/ rev 2. Careful as the scum may bubble up. This may protect the skin a bit more.
I hope this helps.
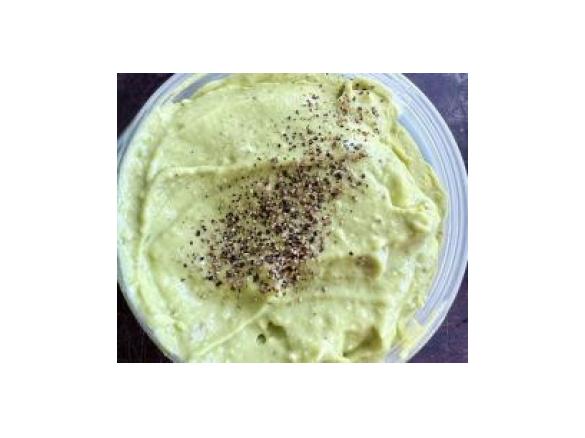
Hello. I have uploaded a picture of my paste and one purchased. It tastes good. But the color is not so nice and even and dark. Could the even color possibly be due to the fact that I soaked the beans overnight?
The consistency is similar to a dough or shortcrust pastry. Not creamy or runny. Is that correct?
I am very happy about tips and answers. I want to use the paste for Taiyaki.
kind regards
kristin
this is so yummy!
Great.
I did it with and without the pre-rinse (Step 2) and I think for the red beans I purchased doing Step 2 created a glossier finish so I will be doing this step in the future. I also simplified the step with the sugar as my normal granulated sugar dissolved in the few seconds of mixing.
Red bean 200g + water 300g: 10 minutes / 100C

Remove water using simmering basket and return red bean to bowl
Add water 550g: 30 minutes / 100C /

<Optional> If it's too watery I add: 5 minutes / 110C /
 (the sugar softens the mix a bit)
Add sugar 150g: 20 - 30 seconds / 0 C / Speed 9
In addition to your tip, I added ice in mine and it seemed to lift the bits off the bottom a little better too.
I also freeze the anko that I don't need that day as well.