

Ingredients
DOUGH
- 300 g water
- 1.5 teaspoon dried yeast, (1 sachet)
- 500 g baker's flour
- 1 teaspoon salt
- 1 teaspoon sugar
- 2 teaspoon olive oil
Accessories you need
-
 Spatula TM5/TM6
Share your activity
I'm cooking this todayRecipe's preparation
Add water and yeast to the Thermomix bowl and heat for 2 minutes / 37° / speed 2.
Add all the other ingredients in the order that they are listed and combine on for 5 seconds / speed 4 and then KNEAD for 3 minutes /
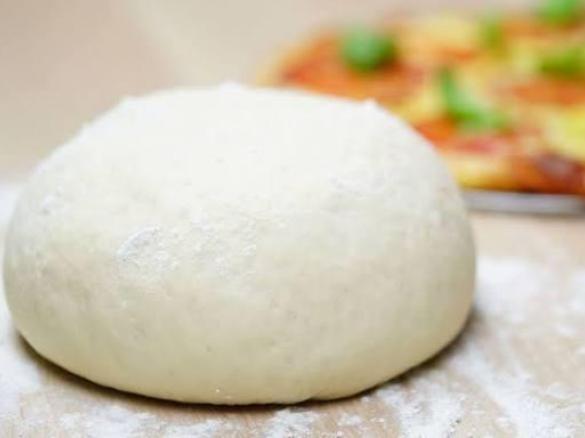
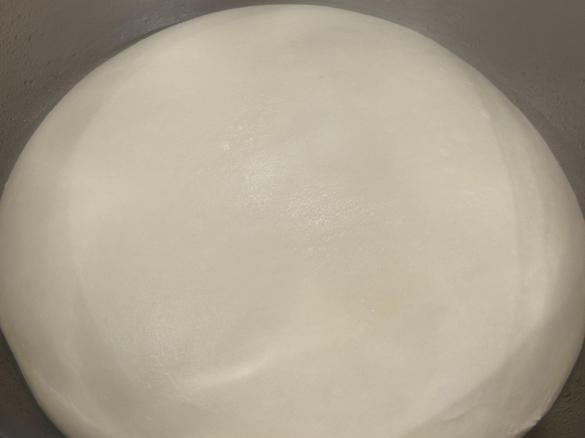
 "Dough mode" . Tip dough onto a ThermoMat and knead by hand for about half a minute and then wrap in the ThermoMat and allow to rise in a warm spot for 30-60 minutes until doubled in size.
A pizza stone (or large tile) should be placed in the oven and it should be pre-heated to 230°C.
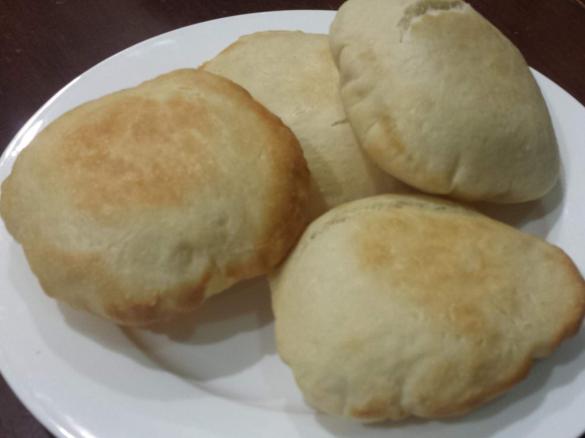
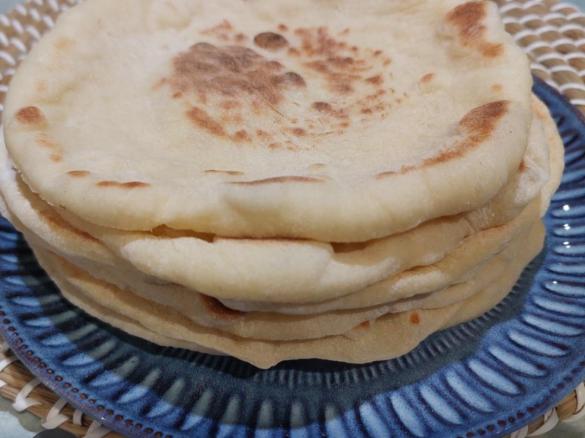
Unwrap the dough and knead gently by hand for another minute and then divide the dough into 12 even portions. Roll each portion into a ball and then flatten to a round disk (using your hand or a rolling pin) to about 15cm diameter. Cover with a damp tea-towel and allow to rest for at least 15 minutes and then place them onto the hot pizza stone and cook for 4 minutes and then flip them over and cook for a further 3 minutes.
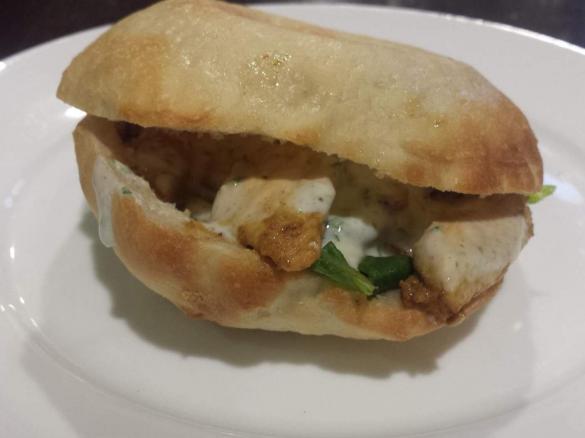
The pita pockets will have puffed up beautifully and will now be golden, hollow pockets that you can fill with any filling you like.
I find it easier to place my dough disks onto baking paper and move them with the paper still attached straight into the oven. It will depend on how big your stone is as to how many you can cook at a time.
If you don't have access to an oven (you might be camping) you could also use a heavy based frying pan with a lid... the pita pockets will puff up just the same but they will have a spotty look about them. They will still taste amazing!
To Make the Dough
Tip
Pita pockets are so very easy to make and, in my humble opinion, a MUST for anyone who hasn't been succeeding with making breads. They are so versatile and healthy and can be filled with anything you like.I team these with Shoarma meat (recipe to follow VERY soon!) and salad but you could even just add cheese and Vegemite and it'll be a yummy lunchbox filler for the kids!
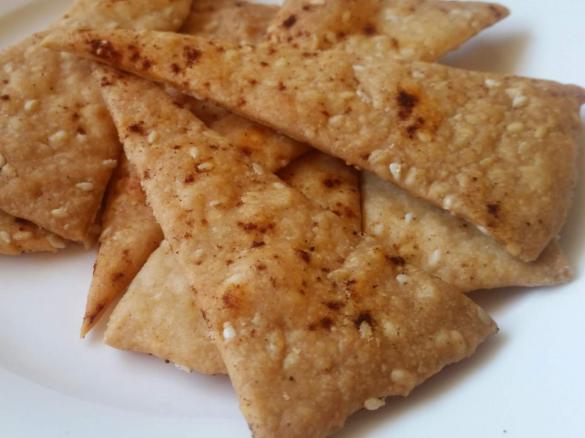
Older pita breads can be cut into triangles and baked to make crispy crackers to serve with a dip! Enjoy!!
Thermomix Model
-
 Recipe is created for
TM 31

This recipe was provided to you by a Thermomix ® customer and has not been tested by Vorwerk Thermomix ® or The Mix Australia Pty Ltd and The Mix New Zealand Ltd.
Vorwerk Thermomix ® and The Mix Australia Pty Ltd and The Mix New Zealand Ltd assume no liability, particularly in terms of ingredient quantities used and success of the recipes.
Please observe the safety instructions in the Thermomix ® instruction manual at all times.


Comments
Turned out perfect, thank you for a great recipe! I just used my regular baking tray as I didn't have a pizza stone and they still puffed up beautifully.
By far the best pita recipe I have tried and will continue using ❤️
Can they be cooked on the stove top (cast iron plate)
lexibakes: Yes, you can turn a cookie sheet upside down and place it in your oven on one of the racks, then heat it / leave it there in the oven when you are pre-heating your oven.
can you make this without the pizza stone?